Effortlessly Set Up Stable Diffusion AI at Home Without Coding
Written on
Getting Started with Stable Diffusion
Recently, StabilityAI unveiled Stable Diffusion, a robust AI image generator that operates on standard graphics cards. The best part? You don’t need any programming skills to get started; everything is laid out step-by-step.
Prerequisites
Before you begin, ensure that your hardware meets the following requirements:
- An NVIDIA GPU with a minimum of 4GB VRAM
- At least 10GB of free space on your hard drive
Step 1: Setting Up Git and Python Environment
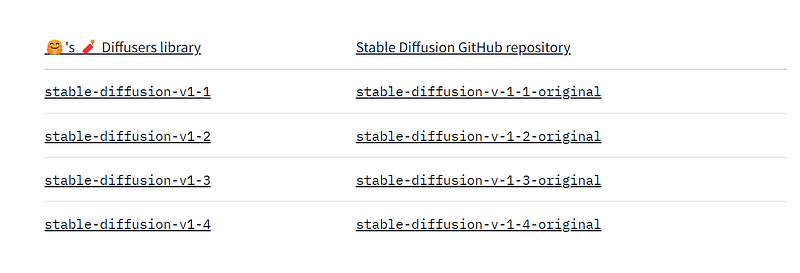
Step 2: Download the Model Weights

Once there, navigate to the “Files and versions” tab, locate the checkpoint file, and download it. Note that this file is over 4GB, so feel free to grab a coffee while it downloads.
Step 3: Acquire the Stable Diffusion Repository
Download the source code from this GitHub repository titled "Stable Diffusion Dream Script," which is a modified version of the original code created by lstein.

After downloading, extract the files to your local machine. Within the “ldm” folder, create a new folder named “stable-diffusion-v1.” Copy the model file sd-v1–4.ckpt from Step 2 into this new folder and rename it to model.ckpt.
Step 4: Activate the Environment
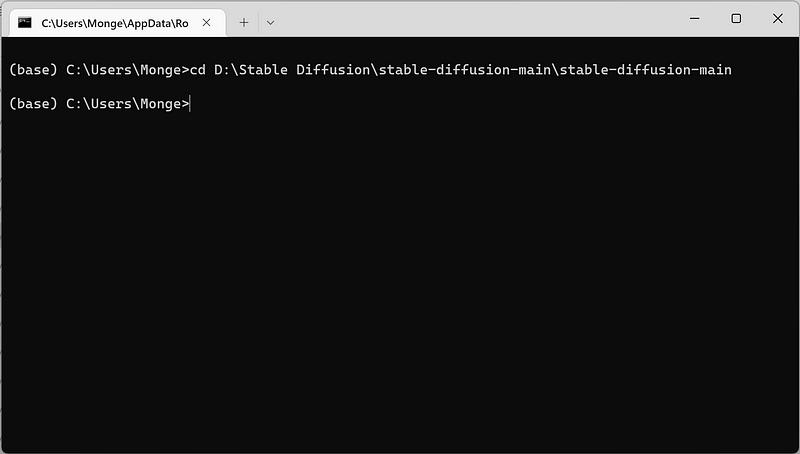
Open the Anaconda command prompt and navigate to the “stable-diffusion-main” folder.

Next, you’ll need to activate several Python packages. Execute the following commands:
(base) ~/stable-diffusion-main$ conda env create -f environment.yaml
(base) ~/stable-diffusion-main$ conda activate ldm
(ldm) ~/stable-diffusion-main$
The first command will download all the necessary dependencies, which may take some time due to the large file sizes. Once that’s done, activate the environment with the command conda activate ldm, indicated by the “ldm” prefix in your command prompt.
Step 5: Load Required Models
Now, load a couple of small machine learning models necessary for Stable Diffusion by running:
(ldm) ~/stable-diffusion-main$ python scripts/preload_models.py
Ensure that you receive a “success” message before proceeding.
Step 6: Generate Images
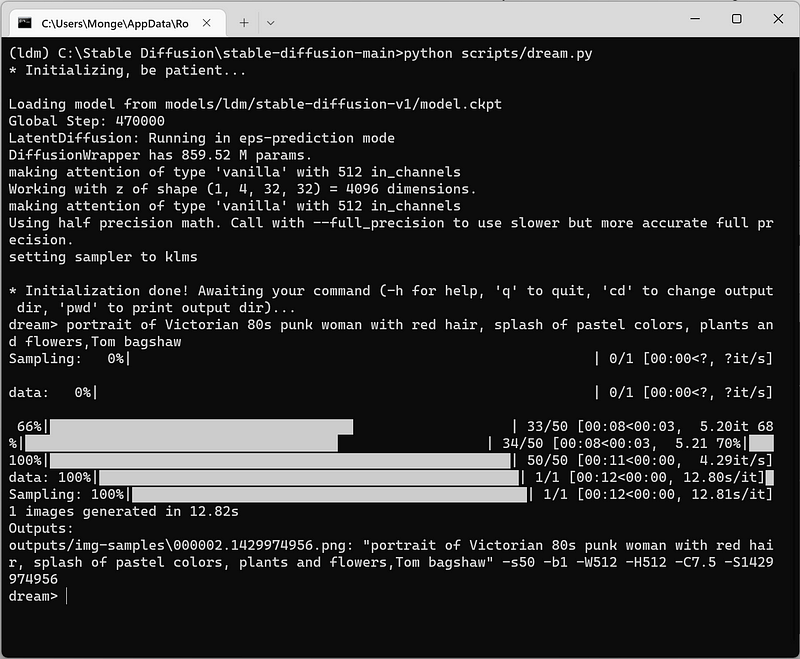
You are now ready to start creating images! Use the command:
(ldm) ~/stable-diffusion-main$ python scripts/dream.py
This will prompt you to enter your desired image description.
This video tutorial, titled "How to run Stable Diffusion at Home - Install Tutorial & Free Online Access! FAST & EASY," provides a detailed guide on setting up the system.
With my setup, an NVIDIA GeForce RTX 3060 Ti with 8GB RAM, it took approximately 12.82 seconds to generate a 512x512 image.

The outcome isn’t too shabby, right?
Conclusion
That wraps up the basic steps! In the upcoming days, I will write another article detailing how to tweak the image parameters, such as resolution and seed, to achieve different results. Feel free to experiment!
If you encounter any issues or wish to showcase your artwork, don’t hesitate to leave a comment.
Update: 09/12/2022
I recently published a new guide on running Stable Diffusion with a GUI, which simplifies the process. The new repository is also an optimized version of the original.
Check out the video "Install Stable Diffusion Locally (Quick Setup Guide) - YouTube" for a quick walkthrough of the installation process.